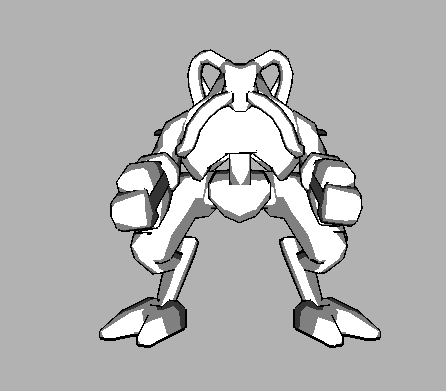
����ʹ��һά�������п�ͨӳ������£��о�д�ò����������һ��Ч��ͼ��
Introduction
Cel-Shading is the "art" of rendering your objects to look like cartoons. Various cartoon effects can be achieved with very little modifications to the original source code. You can have anime effects, as seen in DragonballZ or Gundam, or "classic" cartoons such as Loony Toons. Cel-Shading is a very powerful form of rendering, and it's results can completely change the "feel" of a game. For instance, the cartoon-like graphics of Jet Set and Grind Radio on the Dreamcast add to the atmosphere and help create one hell of a funky game. However, don't expect this form of rendering to make your game amazing overnight - just play Loony Toons Space Race and you'll see that sometimes it doesn't really help at all.
The Basics
As this is an advanced topic, before going any further make sure you have adequate knowledge in the following areas:
• 1D texture mapping.
• Texture co-ordinates.
• Software lighting.
• Vector math.
If you don't, then you will still be able to understand the article, but, since I'm not providing any source code with this article, you may be stuck when the time comes to code a cel shading demo. At the end of each section I will give a brief run-down of how to create the desired effects.
Basic Rendering
We're going to start from the very beginning here. No lights, no outlines, just flat cartoon models. For this, you only need to store two chunks of data - the position and color of each vertex. For basic rendering, we draw after disabling ALL lighting and blending. That's simple enough.
So what's happening here? If we enabled lighting, our objects would look normal, and we wouldn't get the flat cartoon effect we are trying to achieve. We also disable blending to make sure that the vertices don't "bleed" into each other.
Summary
1. Disable lighting.
2. Disable blending.
3. Draw the colored vertexes.
Basic Lighting (Directional)
This is where your knowledge of the topics listed in Section 1 come in use. Each vertex needs to store a little extra data - the vertex normal and a lighting value (a single floating point variable). This normal and lighting value are then used to render the object with basic lighting.
Lighting Maps
Just so I don't confuse you, I don't mean lighting maps such as those used to simulate lighting on objects, ala Quake 1 and Quake 2 (look at the wall-lights to see what I mean). Nor do I mean light/dark maps that highlight/darken specific areas of the maps. What we have here is a completely new form of light map. And guess what? It's a 1D texture.
Go find some anime (Cartoon Network is always a good resource) and look at the lighting on the characters. Notice how it isn't smooth like in real life? The lighting is split into distinctive blocks or bands, the process of this is called quantizing, and the result of this is quantizied colors (thanks to Sulphur Dragon for that one).
This is a 1x16 pixel greyscale texture map (very zoomed in). The black boxes are there to show you the individual pixels. We use greyscale values because they will be combined with the color of the vertex at a later stage. You may have noticed that there are only 3 colors in the map that are simiar to the intensities used in anime movies. The reason we make the texture map 16 pixels wide is so we can modify the values at ease to create different effects, different numbers of colors, etc. You could simply have black and white in there if you wanted, but it is not suggested. You should never put 100% black in the texture, because it makes highlights and outlines look horrible when we add them.
Once you have made your desired texture, load it into whatever API you're using (DX, OGL, software) and leave it alone for now. We'll come back to it in a moment.
Calculating the Lighting
Now your software lighting knowledge is important. However, don't worry if you have not researched software lighting yet, as I will explain it in basic English. Directional lighting is easy. Just make sure you normalize the lighting direction vector!
All we have to do is calculate the dot product between the lighting vector and the normal of the vertex. Why? Well, here's a bit of theory.
The dot product function calculates the angle between 2 vectors and returns it as a value with a maximum of 1. The value returned is actually the cosine of the angle. All you have to do is use the inverse cosine on the value and you will get the angle. However, instead of a costly cosine function, think about the value of a texture coordinate. Texture coordinates are stored as a value between 0 and 1 ([0 <= x <= 1]). It turns out that the dot product (set the value to zero if negative) of the normal and the lighting direction vector actually gives us our texture coordinate!
Rendering the Object
Now you have the texture coordinate for each vertex, and it's time to draw the object. Again, disable lighting and blending, but enable texturing (remember it's a 1D texture). Draw the object the same as before, but this time specify the texture coordinate before the position of the vertex. Voila! One lit, cel-shaded object.
Summary
For all those people who couldn't care less for theory, here's what you need to do.
1. Create a Sharp Lighting map.
2. Calculate and store the dot product between the normal and the lighting direction.
3. Disable lighting and blending.
4. Enable texturing.
5. Set the current texture to the light map.
6. Draw the polygons, specifying only the texture coordinate, color, and vertex positions.
Positional Lights
This method merely requires a little modification of the method described above.
Positional lights offer more flexibility than directional lights for the simple fact that they can be moved around the scene, dynamically lighting all polygons realistically. Although it looks good, the math required is much longer than for directional lighting. It's not more complicated, just longer :-).
Calculating the Sharp Lighting Coordinate
With directional lighting, we simply needed to get the dot product of the light direction and the vertex normal. Now, because positional lighting has no direction (it emmits light in all directions), each vertex will have it's own "ray of light" shining towards it. That's not too bad, until you realise that we're doing this in software.
First of all, we have to create a vector from the position of the light to the position of the vertex. We then normalize this so it has a unit length (magnitude) of 1. This gives us the direction of the light to that particular vertex. Now, we take the dot product of this vector with the normal of the vertex, and repeat the calculation for every vertex in the scene. Argh! That is gonna slow the frame rate down a lot, so let's look at a quick method of reducing the number of lit vertices.
Radius Checking with Positional Lighting
To reduce the number of lit vertices, we first give each light its own radius. Before calculating the lighting values, we see if the vertex is actually within the light's radius (simple point-in-sphere) test. If so, we apply the lighting to it. If not, then we don't. This is basically a point-in-sphere collision detection test, which there are plenty of articles and tutorials out there on (not to mention the message board here at GameDev.net).
Rendering
As with directional lighting, we draw the object but only specify the color, texture coordinate, and position.
Summary
1. Create the Sharp Lighting map.
2. If using a light radius, do a point-in-sphere check to see if the point is within range.
3. Get the vector from the light position to the vertex and normalize it.
4. Get the dot product of the new vector and the vertex normal.
5. Repeat 2-4 for every vertex.
6. Render as usual.
Outlines and Highlighting
Outlines and Hightlights are the little black lines representing the pencil strokes of the rendered cartoon. It may seem daunting, but it's actually easier than you think.
Calculating Where to Highlight
I'm going to refer to outlining and highlighting simply as "highlighting", since they both use exactly the same technique (and are both calculated at the same time). The rule is simple: draw a line along any edge that has one front facing polygon and one back facing polygon. This might sound daft, but look at your keyboard for a second. Note how you can't see the back of the keys? This is because they are facing away, so we would draw a line along that edge to show that there is an edge there.
Notice how I didn't mention anything about polygon culling in the introduction? This is because we get the API to do it for us.
Rendering Highlights
First, we set the line width - 2 or 3 pixels wide normally gives a nice effect. You can also turn on anti-aliasing for this. We change the culling mode to front facing (i.e. remove all front facing polygons). Next, we switch to wireframe mode so we only draw lines. Now, we draw the polygons as usual, except we don't need to specify the color or texture coordinate. What this will do is draw a wireframe mesh of all backfacing polygons, however, due to the magical power of the depth buffer, only lines that are in front of forward facing polygons are drawn (note that this method wouldn't work if we set the line width to 1).
Summary
Okay, here we go:
1. Draw the object as normal.
2. Switch face orientation.
3. Set the color to 100% black.
4. Change to wireframe mode.
5. Draw the mesh again, but only specifying the vertex positions.
6. Restore the original modes.
We're moving along nicely. Let's look at some advanced topics.
Advanced Topics
Now things get difficult. Why? Because we're going to cel-shade textures - something that I have never actually seen done before (I've had to work out all the theory behind this section on my own). So, what you're getting now is 100% original.
Cel-Shading Textures
Now, there are 2 ways of doing this - multiple texturing and my way. Seeing as not every graphics card supports it (almost), we're going to do it my way :-). First, though, we need to revisit the Sharp Lighting map.
In this method, we are actually switching the roles of the texture and vertex color. Instead of the texture shading the color, the color is going to shade the texture.
Creating the Sharp Lighting Map
Remember that lovely little image featured previously in this article? If not, then here it is again:
Previously, we uploaded this texture to whatever API we are using. Now, we keep the values ourselves. Once we've loaded the texture, we have to create an array of floating point values (if you're storing the texture in byte format then just divide each pixel component by 255) and copy over the values. For the object itself, we need to change how we store the data. Here is a list of the data required:
• Vertex positions.
• Vertex normals.
• Texture coordinates (proper ones, not the 1D Sharp Lighting map).
• Sharp Map value (per vertex). This can be stored as an integer.
The only thing we've changed is the vertex colors, which have been replaced with texture coordinates. Now we have a locally stored Sharp Lighting map with object data. Time to do some software lighting.
Lighting Textures
This part hasn't changed much since the last time we discussed lighting. Directional and positional lighting still both work in exactly the same way, but the only difference is that when calculating the dot product of the directional vector and the vertex normal, we multiply it by however wide our Sharp Lighting map is (in this case 16) minus 1 (because the range is 0-15) and cast it into an integer. This integer represents an index in our light map, and will be turned into a color when rendering.
Rendering Cel-Shaded Textures
In DirectX and OpenGL, if you specify the color of the vertex along with the texture coordinate, the color of the texture will be modified to match the color of that vertex. Now, since we're using grayscale values, specifying the color of the texture will brighten/darken the vertex, but combined with Sharp Lighting, it looks cel-shaded. Pretty clever, eh?
So, we specify the color of the vertex. This is done by retrieving the Sharp Lighting value from the vertex structure, and looking up the value in the index map. This gives us a single value. Now, because we're using RGB (if you're not then you can work this bit out on your own), we simply use this value for all components of the RGB triplet. For example, if the lighting value was 0.4, then red would be 0.4, green would be 0.4, and blue would also be 0.4. We then specify the proper texture coordinates of the vertex and finally the position of the vertex. Remember to disable blending and lighting and enable texturing. You should then have a cel-shaded texture drawn onto your screen. If you're using a simple quad it will probably look a bit odd - try tesselating it more (4x4 or something), and it will look better. Highlighting is performed the same way as we discussed before.
Summary
Here's a brief summary:
1. Load the Sharp Lighting map from file and store in an array (remember to convert values to a range of 0-1).
2. Calculate the lighting as normal, but multiply the dot product by the width of the texture - 1 (remember 0-15), and cast it to an integer.
3. When drawing, lookup the color to use in the Sharp Lighting map array, using the lighting value as the index.
4. Use this value for the red, green and blue values of the vertex color.
5. Render the object like you would normally, but remember to update the color for each vertex. Don't forget to disable lighting, etc.
6. Draw the highlights (same as before).
Conclusion
That's all! The most extensive article on cel-shading, available only on GameDev.net (just advertising the site in case this article ever gets archived on another site). If you have any problems with the article, just post to the thread attached to this article, because after my last attempt at an article I was flooded with e-mails, and I want my inbox free of questions like "What's the dot product?" and "Can you send me some source code?".
I hope the information in this article has been beneficial.
Special Thanks:
Dave (MyopicRhino) for putting up this article.
ShiningKnightDX for proving my stupidity on several occasions ;-).
Kenshin (AKA Akura) for proof-reading this and pointing out some stupid errors.
Phoenix for pointing out more stupid errors (why do I feel a pattern forming here?).
Sami "MENTAL" Hamlaoui
Further Reading
I've gathered a couple of links that might be useful to you (i.e. they include source code). One of them is for DirectX 8 and uses Vertex Shaders, and the other is for OpenGL and uses the "proper" technique (the DX version tends to look a bit odd with certain objects). Please note that none of these include information about cel-shading textures (I had to figure that one out myself).
• Cartoon Rendering in DirectX 8 Using Vertex Shaders
• Cartoon Rendering in OpenGL
These are the two links that I found the most useful (the OpenGL being more useful than the other). There are probably more references out there (if there isn't then I am very surprised), but these two should help you out dramatically.
Appendix A Multiple Light Sources
For those of you who have way to many CPU cycles to spare, this is a good method of using them up :-). If you look back to when we calculate the Sharp Lighting value for the vertex, you will see that it has a minimum value of 0 and a maximum value of 1. Now, if we have another light lighting that vertex, you compare the existing lighting value with the newly created one. If the new light value is higher, then replace the existing one with that. If it's darker, then ignore it. That's just another stupidly simple trick that will make your scene look nicer (despite running at 1fps).
Edited by Kevin Hawkins (kevin@gamedev.net)
 ���������ͼƬ���£�

 [����] ����XML��̳ - רҵ��XML���������� ��
�����������Ӧ�� �� �� C/C++���˼�� �� �� Cel-Shading[ת��]
[����] ����XML��̳ - רҵ��XML���������� ��
�����������Ӧ�� �� �� C/C++���˼�� �� �� Cel-Shading[ת��]


 (���ı���)


 ������


 Cel-Shading[ת��]
